Last week Mira of Scrappy Mom asked me how you made blinkies so I have done this tutorial to explain how I make mine. We all love blinkies and making them is not so hard as you think. For ages I thought they must be so hard to do.....but they're not. If you can do a layout then you can make one of these!!!
Later next week I'll do tut on how to put your blinkies in Blogger with a link.
Basically you are working with layers as you do on a payout but on a smaller scale. How many layers you work with depends on how you want your blinkie to look. I'm sure that my way is not the only way but it works for me.
Basically you need your normal graphics package to make the layout of the layers that make up the blinkie and also an animation software package to bring it to life. If you don't have animation software in your package there are some great free ones out there that you could use. Or try a trial from people like Ulead Gif Animator they offer a 15 free trial...plenty of time to practice your blinkie skills, lol!! (No, this is not an advert!!!)...or Google "Free Animation Software" and see what it comes up with.
I have written the tutorial using CS2 but you can use the same principles in the software you use.
There is a a download link at the end in case you prefer printing the tut instead of reading it from here. So lets get started.
1. Blinkies can be any size, but they do need to be small and the resolution should be 71 dpi for the Internet.
I want a finished blinkie that will be 150 pixels x 50 pixels, 72 dpi.
This is a very small size to work on screen with so I am going to start with it a bit bigger and reduce it down to 150 pixels x 50 pixels at the end.
2. So that we can see what were doing lets make it "Fit on Screen".
Now we are ready to play!!
I'm going to keep mine simple but once you get the idea you can make yours as fancy as you want with loads of layers.
3. For the first layer pick the colour you would like as the background and using the paint bucket fill the layer.
Next I opened the file with one of the trees from the freebie Springtime Blog Train Kit. (If your going to use elements that you have always, remember to reduce the dpi to 72 and make sure that the size is reduced to scale with the blinkie size.) Plus check the TOU of the designer to make sure it's OK to use.
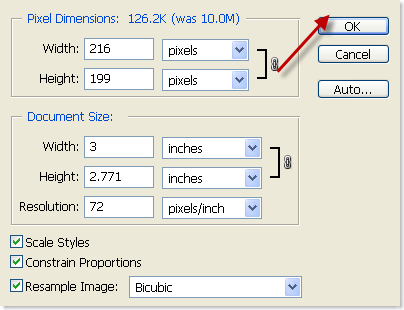
I reduced the tree to 71dpi and then the size to 216x199 as my starting point. (Don't panic because it looks blurry at this stage.)
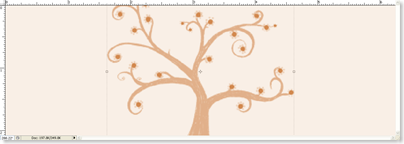
Now drag the tree/element to the blinkie file, don't forget to hold down the shift key. The tree will be in it's own new layer above the colour layer.
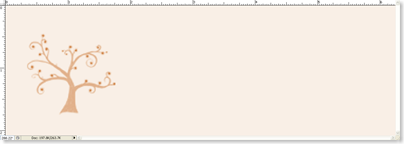
As you can see the tree is still too big so using Edit>Transform>Scale I have resized it down till I get it to the size I want.
Like this.
4. Every layer of the blinkie needs to have a solid background colour or paper. These are normally the same for each layer, but you can make them different if you want...it's up to you. I am using the same colour through out.
So we need to merge the solid colour and the tree to make our first blinkie layer. To do this click on the colour layer and hold down the CTR key, then click on the tree layer. this will make them both active.
Now press CTRL + E, to merge the two layers. Nnow have one layer with the tree and the colour.
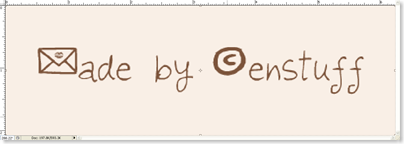
5. Text layers work well in blinkies, so I added a new layer of the solid colour and then a text layer. When I had the text how I wanted it I merged the colour and the type layers.
For my next layer I did exactly the same as for the first layer but moved the position of the tree and changed the colour of it to pink.
Okay I only have three layers...rather a sorry little blinkie!! But you can add as many layers as you want to your, but by now you have the basic idea.
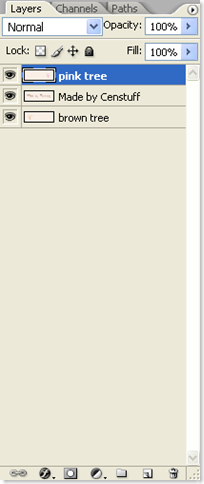
Here's what my Layers Palette looks like, I have named the layers so that I know what each one is. It helps when everything is so small and we do need them in the right order or the blinkie will "blink" in the wrong sequence.
6. When you have finished adding layers the image size needs reducing down before we continue.
Go to Image>Image Size
Reduce the size to 150 pixels x 50 pixels, keep at 72dpi and we're ready to animate!!
A word of warning!!! Make sure you save your blinkie at this stage as PSD file. If you decide that you want to make changes later it would be awful to have to start from scratch!!
7. Now click on the icon to edit in image Ready or Ctrl+Shft+M.
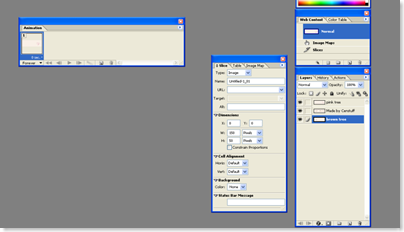
Your screen in Image Ready should look something like this.
8. Make sure the first layer of your blinkie is the active one and then click the little eye next to the other layers to hide them.
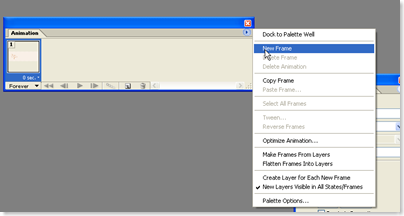
9. Move to the Animation Palette where you will see you have your first frame (layer) showing. Now we need to add the next frame. Click on the small arrow in the top right of the Animation Palette and pick New Layer.
Next make the second layer in your Layers Palette active by clicking on the layer and then on the little eye to reveal it again. The will add the layer as a frame in the Animation Palette and so you have two!!
10. Repeat this process until you have added all of your layers as frames into the Animation palette .
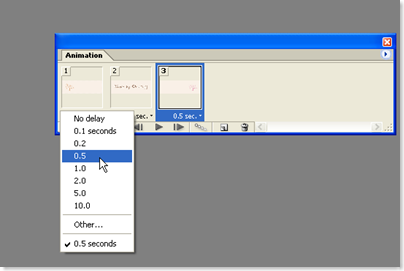
11. We need to set the time that each frame will show for before the next frame appears. I am going to set mine to 0.5 second. To do this move to the first frame and click the arrow in the bottom left corner and pick the delay time you want.
Do this for all the frames. Normally I set them for the same amount of delay but again that's up to you.
To see what you blinkie will look like working, press the play button and it will run through the sequence for you.
Assuming your happy with it we need to save it. It's important that the file is saved as a GIF. So make sure that you change it if it's on JPG.
Click on GIF and use the following settings to optimise it.
Save it as File>Save Optimised As and name your blinkie and click OK.
Now you have a blinkie.... but to use it you need to upload it to the place Internet where you store your images, somewhere like Photobucket.
When you have it upload you can copy the URL and past it into your signature in Forums etc.

Boy that was a LONG post!!!
I hope you could follow it and please feel free to download the PDF to use as you do make it. Any questions email me and just ask.
***If you want to know how to add a blinkie to Blogger then check back next week for a tut on how to do it.









24 comments:
What a great tutorial! I will have to try it after I find the animation software!! Thank you!!!! HUGS!!
Awesome!!!
Great Tut...thanks so much
((hugs))
Yehey, thanks June for this tut, I hope to create one soon ;-).
Wow June - thanks so much.... this is an awesome tutorial. I'll have no excuses now not to have a blinkie will it - LoL.
Hi. Just doing your tutorial. I have pse 6.0 and I can't seem to find the image ready command anywhere to keep going. any tips?
Great Tutorial!!
:D
Thanks for the tut! I can't wait to play!
You make this look so easy. Next week I get CS2 and this will be a perfect learning curve. (I currently use PSE7) I will let you know how it goes. Thanks. )
Thanks so much! I've always wondered how blinkies are done. Can't wait to give it a try.
Two thumbs up from me.
great and easy to understand tutorial.
keep up your good job in here please.
see you around.
wonderful tutorial - thank you soooo much :)
Most excellent - I did download the instructions and bookmarked your blog so I can visit again. Have a great weekend
Morning, June,
Thank you for the tut on blinkies. I have only made a couple of them, so far. But, now, I want to go play. LOL I have Microsoft's Gif Animator. It is totally free, always, and it is quite simple to use. It can be found here:
http://ms-gif-animator.en.softonic.com/
I have not compared it to your tut, but, it is pretty similar.
Check it out, if you want. Perhaps, you could offer this to those who don't have another program, as well as the Ulead.
Love ya and Thanks,
Su
Hi June, What a wonderful tut and thank you for taking the time to create it! I'm stuck though, I have CS4 and I can't seem to locte a "ready image" command, any suggestions?
Perfect tutz! Thanks for sharing.
Thank you so very much for sharing this and in CS2! I have CS2 but very little skill - your easy to follow tutorial is just what I've been wishing for. (((BIG HUGS)))
Thank you June for researching the issue I was having with the TUT you wrote up for the blinkies! I have Microsoft GIF Animator thanks to the suggestion of suruha above! I can't wait to try it out. Again THANK YOU!
Oneday! Oneday! I WILL learn how to do this, thanks for the tut June x
What an Amazing Tut ;) I just made me a blinkie a couple of weeks ago and pretty much that was how I made it but with a lot more layers!! I downloaded your tut anyway since it is a great resource :)
This was very easy to do. Thank you sooo very much for sharing. Something I have been wanting to learn......
Thanks for the tut. Do you know how to make a blinkie on CS4? I need some help with the saving.
Thank you so much for sharing...I have been looking everywhere for a tut on how to do this. :)
Thank you so much for posting this! You helped explain a lot that I didn't understand.
I hope you don't mind my explanation here for those with CS4 (hoping it might help someone else!):
I have CS4, and I found out that while CS4 doesn't have ImageReady anymore, it does have the same abilities. You follow the directions up until the part where you start animating it. Instead of pressing CTRL+SHIFT+M, you go to Windows, Animation, and it pops up the same screen. It looks like the rest of the directions match up the same.
Then to save it, you go to File, Save for Web and Devices. Then you make sure it's saved as a GIF file.
Anyway...thanks again for taking the time to create this tutorial. It's been very helpful!
Thank you so much for making this tut!!
Post a Comment